Media Library Files
Follow Good File Naming Practices
Proper file naming helps avoid problems and can actually improve the value of your web pages.
Well-named files…
- Improve search results
- Make identifying files easier
- Keep URLs neat, tidy, and easy to read
- Allow you to replace outdated files without having to adjust the file name
Proper file naming involves using appropriate keywords – descriptive words or phrases someone might search for – and avoiding spaces, special characters, and dates.
File Naming Rules
- Use a hyphen between words
- Put important keywords at the front of the file name
- Don’t run words together
- Don’t use spaces or underscores to separate words
- Don’t use special characters in the file name (including #, %, &, $, and most other symbols)
- Don’t place dates in the file name but, if necessary, within the file itself – in the header, footer, or even the title
Web browsers replace spaces in filenames with “%20,” making it difficult for humans to read. Running words together is not as difficult for humans to read, but search engines can’t distinguish individual words that have no separator. But both humans and search engines can read a neat and tidy name.
Good File Name Examples:
- student-leader-move-in-day.jpg
- LUOA-4th-Grade-Curriculum-Guide.pdf
Not-So-Good File Name Examples:
- 20120814_3511JR.jpg
- LUOA_4th_Grade_Curriculum_Guide_rev__10-2013.pdf
- LUOA 4thGradeCurriculumGuide rev10-2013.pdf
Document Accessibility
Files (PDFs, Word documents and more) uploaded to your Media Library should meet accessibility requirements. Review our Web Accessibility guide for information on how to create accessible files.
Replacing Documents with the File Replacement Tool
You can save yourself a lot of time and inconvenience by replacing outdated files instead of adding a new one with each update.
Some of the benefits of this method include:
- No page/WYSIWYG updates required
- This is especially helpful if your file is linked on many pages
- No need to delete old files
- No clutter builds up from archives of old and unused files
Steps to “Replace Media”
- Check the name of the file that you are replacing and give your new file the exact same name.
It is case sensitive, so make sure that capitalized letters match too. Example: uganda-trip-application.pdf - Open the Media Library and locate the file you would like to replace.
Click on the file to open the attachment details window. - Select the “Upload a New File” button located next to “Replace Media.”
After clicking the button, you will be taken to the Replace Media Upload page.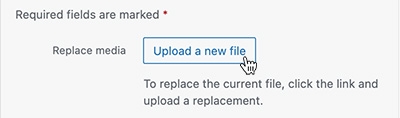
- Upload the new file from your computer. Set Replacement Options to “Just Replace the File” and Date Options to “Keep the Date.”
Your replacement file should be the same file type as the current file. For example, if you are replacing a pdf, your uploaded file should also be a pdf.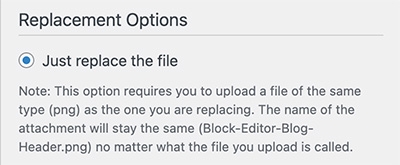
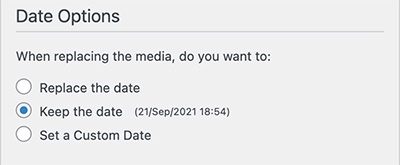
- Click “Upload.” Once complete, you should see “File successfully replaced” appear at the top of the page.
- Check that your file uploaded correctly by opening a page where the file is linked to.
You may need to hold your “shift” key and refresh the browser window in order to see the updated version of the file.